When people learn that I’m a mining engineer, I’ll normally get perplexed looks and asked what that job is about. Most never even knew the job existed.
 So I thought what better way to explain the mining engineer role than by describing the anatomy of a typical Chapter 16 (MINING) in a 43-101 Technical Report. That chapter is a good example of the range of tasks typically undertaken by mining engineers.
Secondarily it also provides an opportunity to describe in detail all the steps that go into writing a Chapter 16, focusing on the PEA.
PEA’s tend to have a poor reputation for lack of accuracy, and this blog post may shed some light on why that is. To avoid running on too long, I have subdivided this into Part 1 and Part 2.
Generally, one will see a single QP sign off on Chapter 16. However, the chapter requires input from several people. Section 16 is generally prepared in the same way for a PEA or a feasibility study (FS). The main difference is related to the amount of hard supporting data in a FS versus a PEA.
The PEA will rely on many “reasonable assumptions” and it can be done in at least half the time of a FS. A FS will also build on previous study decisions, something a PEA doesn’t have access to since it is a first time snapshot of a project.
Normally preparing Chapter 16 is done under time pressure to deliver results as quickly as possible. Other study team members are waiting for its output to finalize their own engineering work.
1. Define the Mine
In a PEA, the first thing that must be conceptualized is whether this will be an open pit (OP) mine, underground (UG), or a combination of both.
 There is always a mineral resource estimate available before doing a PEA. The way the resource is reported will indicate what type of mine this likely is. The geologists have already done some of the mining engineer’s work.
The mineral resource will suggest if this will be an OP or UG, a large or small operation, a long life or short life, and the likely processing method. The framework for the project is already set at the mineral resource estimate stage.
We can now write page 1 of Chapter 16.
2. Optimize the Pit Size and Shape
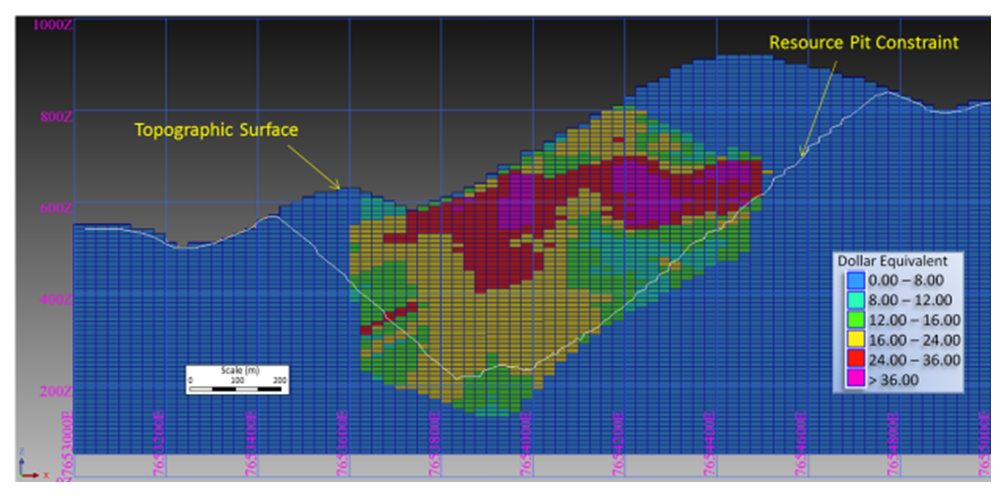
The first step for the mining engineer is a pit optimization analysis to define the approximate size and shape of the pit. The pit optimization step creates a series of nested economic pit shells for different metal prices. For example, the base case gold price may be $1800/oz, but we still want to see what size of pit would be economic at $1000/oz, $1200, $1300, etc. Normally one may run 50 different price scenario increments. The smaller shells may eventually be good starter pits to help improve NPV and payback time.
 Before starting pit optimization, we require economic inputs from several people. The base case metal prices must be selected (normally with input from the client). The mining operating cost per tonne must be estimated (by the mining engineer). The processing engineers will provide the processing cost and recovery for each ore type.
The geotechnical engineers will provide approximate pit wall angles. All of these inputs have to be forecasted at a very early stage. We don’t yet know the size of the pit, the ore tonnage available, nor the actual plant throughput rate but one must still predict some costs. Hence these initial inputs might just be ballpark data.
In the final cashflow model you may eventually see slightly different metal prices, costs, or recoveries than used in pit optimization. That’s because that cashflow model inputs are generated by the study, while the optimization inputs are pre-study estimates.
The pit optimization step may also need to apply constraint boundaries. For example, if there is a nearby property limit or river, one may want to constrain the pit optimization to get no closer than 50 metres to the river or boundary. The pit shell optimizer may be free to expand the pit outwards in multiple directions, except that one direction.
 Once the optimization is run, a series of nested pit shells are created, each with its own tonnes and grade. These shells are compared for incremental strip ratio, incremental head grade, total tonnes, and contained metal.
A decision must now be made on which shell to use for the mine design. Larger economic shells may have more tonnes, lower grade, and higher strip ratio. Smaller shells may have lower strip ratio and better grade.
For example, a smaller shell may have 10 year life containing 800,000 oz at a strip ratio of 2:1 while a larger shell may have 14 years, 1 million oz at a strip ratio of 3:1. Both are roughly the same economically. However, developing the larger shell may require more mining equipment capital yet have a lower average cost per tonne. Which shell do you choose?
There can be dozens of such shell to shell trade-offs and typically one doesn’t run schedules and cost models on all of them. The client will have input on whether they wish to move forward with 10 years 800,000 oz or the 14 years with 1 million oz. Sometimes selection is driven by investors having size expectations that need to be met.
Some people may say ‘Well… just run cashflow models for each case to see which is best”. The problem with doing too much analysis at this stage is that if you re-do the pit optimization with different recovery, operating costs, pit wall angles, you will get a different optimization result. It becomes a question of how much detail work to do on something that is based on very preliminary input parameters.
Assuming the mining engineers have now selected the preferred shell for mine design, they can move on to mine design. We can now write more of Chapter 16 to page 5.
3. Open Pit Design.
 The mining engineer is now ready to undertake the pit design. The pit design step introduces a benched slope profile, smooths out the pit shape, and adds haulroads. Hence a couple of key input parameters are required at this time. The mining engineer will need to know the geotechnical pit slope criteria and the truck size & haul road widths. Let’s look at both of these.
Pit Slopes: Geotechnical engineers are responsible for providing the slope angle criteria to the mining engineers. The geotech engineers may have a lot or little information to work with. Perhaps they have geotechnical oriented core holes and they have undertaken some rock strength testing.
Perhaps the only information for the geotechnical engineers is rock quality data from exploration drilling. I have seen both situations at the PEA stage; the latter is more typical. In the feasibility study they would have geotechnical core hole data available. At the PEA stage, that is less likely, since no one yet knows the size and depth of the pit. We are only getting to that now.

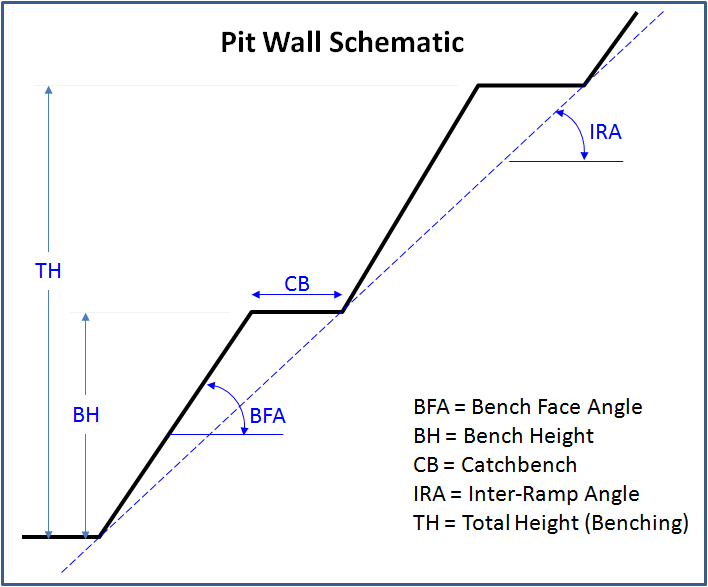
Pit wall schematic
The geotechnical engineers will provide the inter-ramp slope angles, specified by catch bench widths and bench face angles. The engineers may subdivide slopes by rock type.
For example: the overburden wall is to be at 30 degrees, the underlying oxide rock at 40 degrees and the deeper fresh rock wall at 55 degrees. Additionally, the pit may be subdivided into pie shaped sectors, with differing slope criteria.
For example, the fresh rock on the west wall might have a 55 degree angle, but the east wall fresh rock may only allow 50 degrees and the south wall is 45 deg.
The more sectors and differing slope criteria, the more complex it is to do the pit design. Normally you don’t see geotechnical engineers signing off as QP’s for Chapter 16, although they had key input into the pit design.
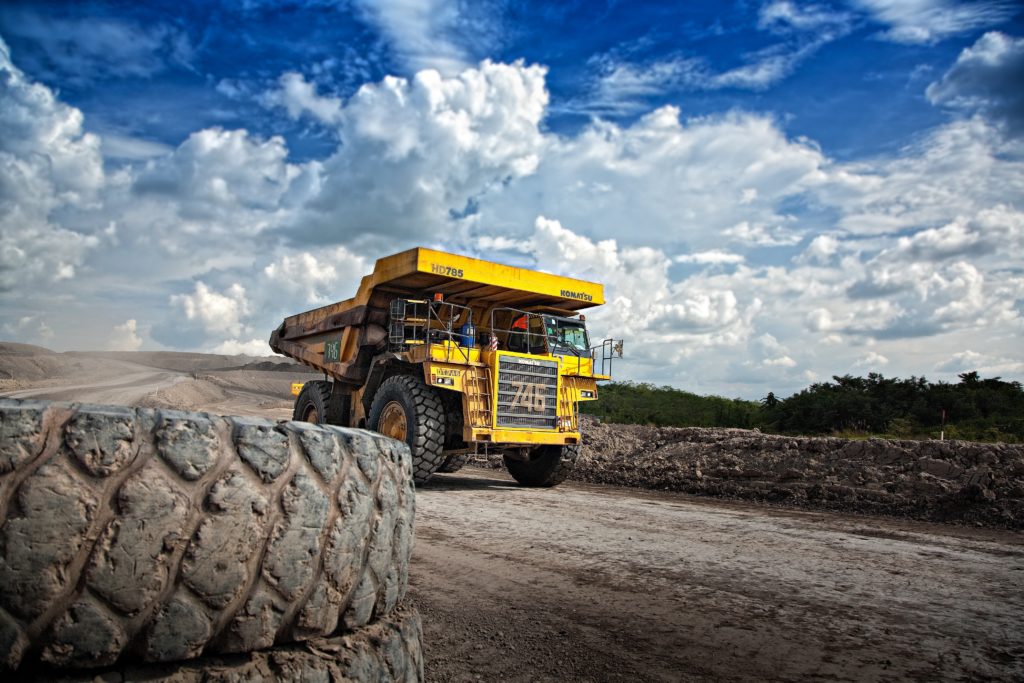
 Ramps: Next the mining engineer needs to select the truck size, even though the production schedule has not yet been created.
Trucks sizes can vary between 30t up to 350t. A double lane ramp width is approximately 4.5 times the truck width, including space for a ditch and an outer safety berm. A 90 tonne truck is 6.7 metres wide (haulroad of 30m) while a 350 tonne truck is 9.8 m wide (haulroad of 44 m wide). That’s a 14m width difference.
The haul road gradient is normally 10%, which means a 200 metre deep pit requires a ramp length of 2000 metres to get to the bottom. It can be difficult to fit a 2 kilometre ramp in a small pit without pushing the walls out to provide enough circumference to get to depth.
Ramps can spiral around the pit, or they can zigzag back and forth on one side of the pit (switchbacks). The mine engineer will decide this once they see the topography, pit size, and ore body orientation. Adding ramps in a pit design pushes the crest outwards and adds waste to be stripped.
Pit Phases: After the pit design is complete, the mine engineer will design multiple interior phases to distribute the waste and ore tonnages in the mining schedule. These phases are sometimes referred to as pushbacks, laybacks, or stages. At mine start-up, one doesn’t want to strip the entire top off of a large pit. A smaller pit within the large pit will allow faster access to ore.
This completes the open pit design and now allows one to write to page 10 of Chapter 16. However, the mining engineer is not done yet.
Conclusion


 This ends Part 1. In Part 2 we will discuss the mining engineer’s next tasks; production scheduling; waste dump design; and equipment selection. The mining engineer QP will sign off and take responsibility for all the mine design work done so far. You can read Part 2 at this link “
Thank you for your posts, Ken. I’m not sure why it took so long for me to find your blog, but I will definitely make some of these essential reading as part of onboarding for CIM Magazine.
Hi Ryan, Thanks for the feedback. My blog may be a bit of a niche blog, targeting mining engineers. So more technically oriented a lot of the time.
This is excellent simple but very effective info well understood especially for us Geologists who are migrating to Mining Engineering. Ken I am very disappointed that I should have been aware of your blog earlier. This should have helped to pass my mining engineering modules with ease, but however its never too late. Am so grateful to you for the informative blogs. Consider me as one of your followers.
Once again thank you so much for a job well done indeed. I have learnt from you what I could not comprehend all these years.
Thank you very much for the kind words. I am grateful that you find my blogs helpful. If you have any questions, don’t hesitate to connect on LinkedIn or message me via my email at KJKLTD@rogers.com.