


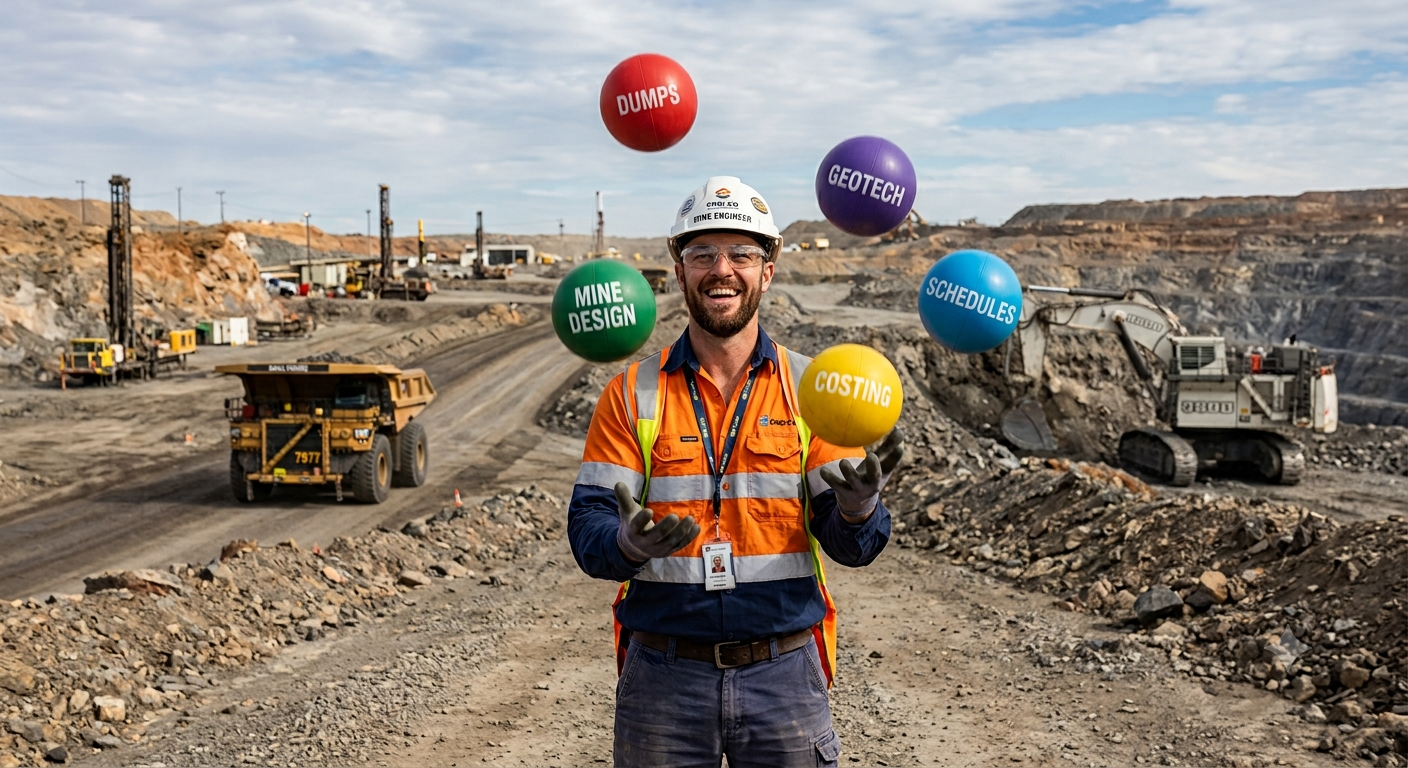
 When people asl what I do and learn that I’m a mining engineer, I’ll normally get perplexed looks. Most people don’t even knew the job exists
So I thought what better way to explain the mining engineer role than by describing the anatomy of a typical Chapter 16 (MINING) in a 43-101 Technical Report. That chapter is a great example of the range of tasks being juggled by mining engineers.
Secondarily it also provides an opportunity to describe in detail all the steps that go into writing a Chapter 16, focusing on the PEA level study.
PEA’s tend to have a poor reputation for lack of accuracy, and this blog post may shed some light on why that is. To avoid running on too long, I have subdivided this into Part 1 and Part 2.
Generally, one will see a single QP sign off on Chapter 16. However, the chapter requires input from several people. Section 16 is generally prepared in the same way for a PEA or a feasibility study (FS). The main difference is related to the amount of hard supporting data in a FS versus a PEA. In a PFS or FS, some of the Chapter 16 content is moved into Chapter 15 (MINERAL RESERVES).
The PEA can rely on many “reasonable” assumptions and it can be done in at least half the time of a PFS/FS. A FS builds on previous study decisions, something a PEA doesn’t rely on since it often is a first time snapshot of a project.
Normally preparing Chapter 16 work is done under time pressure to deliver results as quickly as possible. Other study team members are waiting for its output to be able to finalize their own work.
1. Define the Mine
In a PEA, the first thing that must be conceptualized is whether this will be an open pit (OP) mine, underground (UG), or a combination of both.
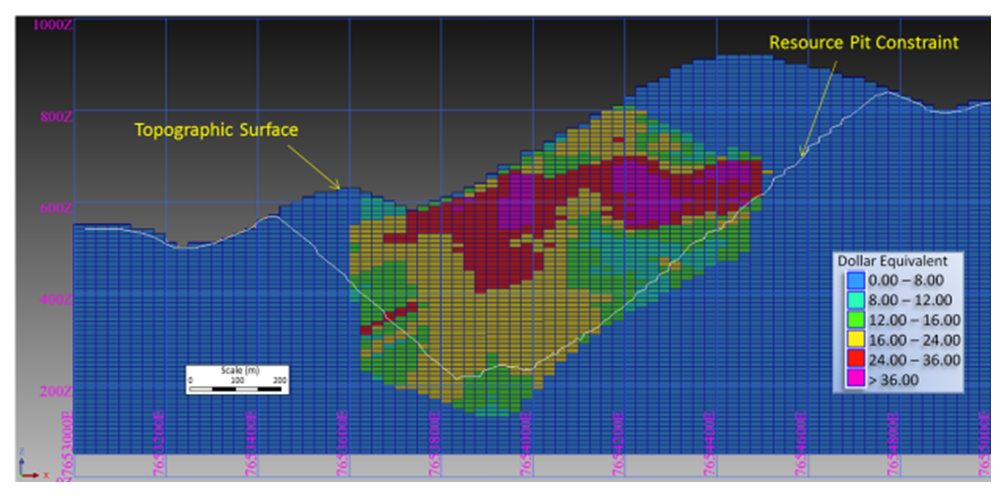 There is always a mineral resource estimate available before doing a PEA. The way the resource is being reported will indicate what type of mine this likely is. The geologists have already done some of the mining engineer’s work.
The mineral resource constraining will suggest if this will be an OP or UG, a large or small operation, a long life or short life, and the likely processing method. The framework for the project design is already being set at the mineral resource estimate stage.
With the resource in hand, we can now write page 1 of Chapter 16. The focus of the discussion will be on an open pit project.
2. Optimize the Pit Size and Shape
The first step for the mining engineer is a pit optimization analysis to define the approximate size and shape of the pit. The pit optimization step creates a series of nested economic pit shells for different metal prices. For example, the base case gold price may be $3000/oz, but we still want to see what size of pit would be economic at $2500/oz, $2800, $4000, etc. Normally one may run 50 different metal price scenarios. The smaller pit shells may eventually be good starter pits to help improve NPV and payback time.
 Before starting pit optimization, we require economic inputs from several people. The base case metal prices must be selected (normally with input from the client). The mining operating cost per tonne must be estimated (by the mining engineer). The processing engineers will provide the processing cost and recovery for each ore type.
The geotechnical engineers will provide approximate pit wall angles. All of these inputs have to be forecasted at a very early stage. We don’t yet know the size of the pit, the ore tonnage available, nor the actual plant throughput rate but one must still predict some costs. Hence these initial inputs might just be ballpark data.
In the final cashflow model you may eventually see slightly different metal prices, costs, or recoveries than used in pit optimization. That’s because that cashflow model inputs are generated by the study, while the optimization inputs are pre-study estimates.
The pit optimization step may also need to apply constraint boundaries. For example, if there is a nearby property limit or river, one may want to constrain the pit optimization to get no closer than 50 metres to the river or boundary. The pit shell optimizer may be free to expand the pit outwards in multiple directions, except that one direction.
 Once the optimization is run, a series of nested pit shells are created, each with its own tonnes and grade. These shells are compared for incremental strip ratio, incremental head grade, total tonnes, and contained metal.
A decision must now be made on which shell to use for the mine design. Larger economic shells may have more tonnes, lower grade, and higher strip ratio. Smaller shells may have lower strip ratio and better grade.
For example, a smaller shell may have 10 year life containing 800,000 oz at a strip ratio of 2:1 while a larger shell may have 14 years, 1 million oz at a strip ratio of 3:1. Both are roughly the same economically. However, developing the larger shell may require more mining equipment capital yet have a lower average cost per tonne. Which shell do you choose?
There can be dozens of such shell to shell trade-offs and typically one doesn’t run schedules and cost models on all of them. The client will have input on whether they wish to move forward with 10 years 800,000 oz or the 14 years with 1 million oz. Sometimes selection is driven by investors having size expectations that need to be met.
Some people may say ‘Well… just run cashflow models for each case to see which is best”. The problem with doing too much analysis at this stage is that if you re-do the pit optimization with different recovery, operating costs, pit wall angles, you will get a different optimization result. It becomes a question of how much detail work to do on something that is still based on very preliminary input parameters.
Assuming the mining engineers have now selected the preferred shell for mine design, they can move on to mine design. We can now write more of Chapter 16.
3. Open Pit Design.
 The mining engineer is now ready to undertake the pit design. The pit design step introduces a benched slope profile, smooths out the pit shape, and adds haulroads. Hence a couple of key input parameters are required at this time. The mining engineer will need to know the geotechnical pit slope criteria and the truck size & haul road widths. Let’s look at both of these.
Pit Slopes: Geotechnical engineers are responsible for providing the slope angle criteria to the mining engineers. The geotech engineers may have a lot or little information to work with. Perhaps they have geotechnical oriented core holes and they have undertaken some rock strength testing.
Perhaps the only information for the geotechnical engineers is rock quality data from exploration drilling. I have seen both situations at the PEA stage; the latter is more typical. In the feasibility study they would have geotechnical core hole data available. At the PEA stage, that is less likely, since no one yet knows the size and depth of the pit. We are only getting to that decision now.
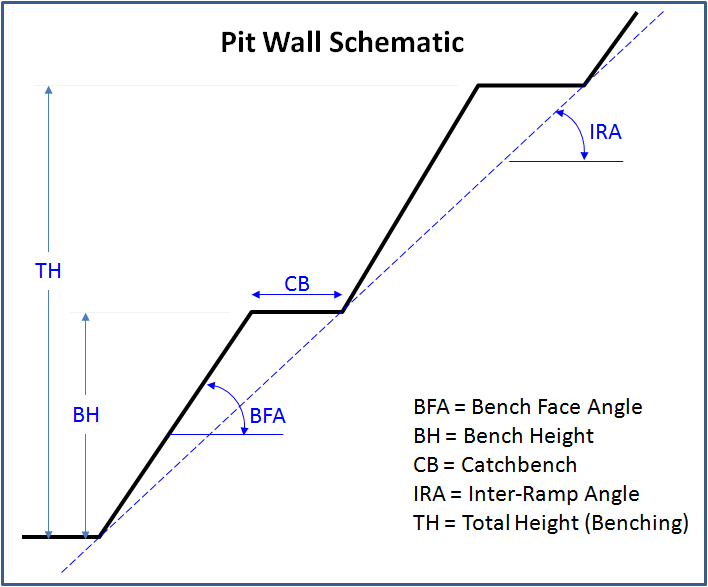
Pit wall schematic
The geotechnical engineers will provide the inter-ramp slope angles, specified by catch bench widths and bench face angles. The engineers may subdivide slopes by rock type.
For example: the overburden wall is to be at 30 degrees, the underlying oxide rock at 40 degrees and the deeper fresh rock wall at 55 degrees. Additionally, the pit may be subdivided into pie shaped sectors, with differing slope criteria.
For example, the fresh rock on the west wall might have a 55 degree angle, but the east wall fresh rock may only allow 50 degrees and the south wall is 45 deg.
The more sectors and differing slope criteria, the more complex it is to do the pit design. Normally you don’t see geotechnical engineers signing off as QP’s for Chapter 16, although they had key input into the pit design.
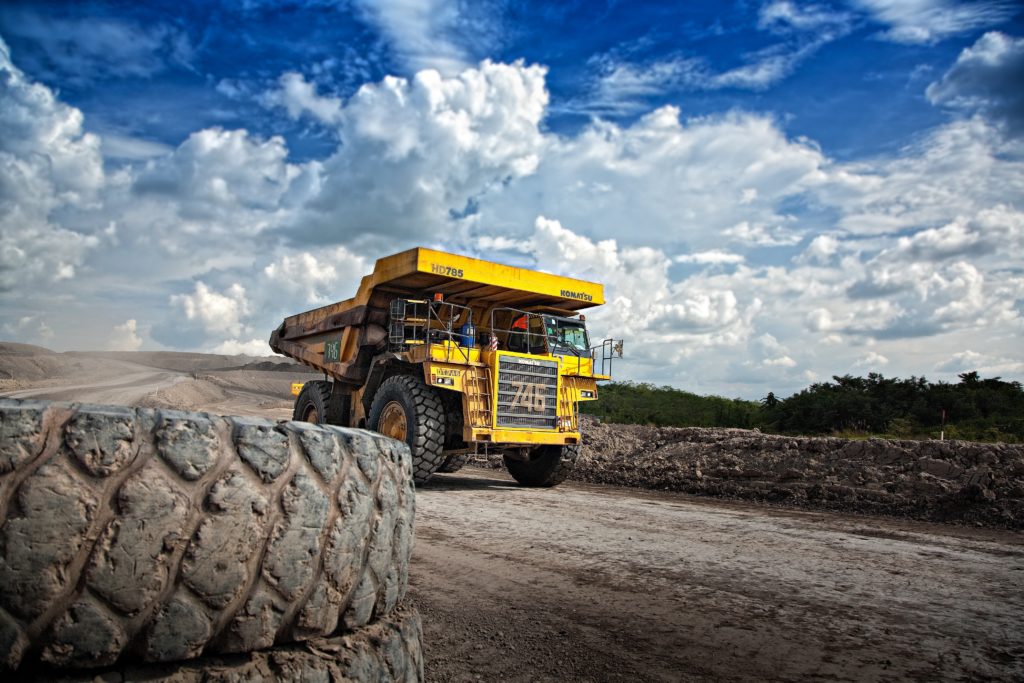 Ramps: Next the mining engineer needs to select the truck size, even though the production schedule has not yet been created.
Trucks sizes can vary between 30t up to 350t. A double lane ramp width is approximately 4.5 times the truck width, including space for a ditch and an outer safety berm. A 90 tonne truck is 6.7 metres wide (haulroad of 30m) while a 350 tonne truck is 9.8 m wide (haulroad of 44 m wide). That’s a 14m width difference.
The haul road gradient is normally 10%, which means a 200 metre deep pit requires a ramp length of 2000 metres to get to the bottom. It can be difficult to fit a 2 kilometre ramp in a small pit without pushing the walls out to provide enough circumference to get to depth.
Ramps can spiral around the pit, or they can zigzag back and forth on one side of the pit (switchbacks). The mine engineer will decide this once they see the topography, pit size, and ore body orientation. Adding ramps in a pit design pushes the crest outwards and adds waste to be stripped.
Pit Phases: After the pit design is complete, the mine engineer will design multiple interior phases to distribute the waste and ore tonnages in the mining schedule. These phases are sometimes referred to as pushbacks, laybacks, or stages. At mine start-up, one doesn’t want to strip the entire top off of a large pit. A smaller pit within the large pit will allow faster access to ore.
This completes the open pit design and now allows one to write to page 10 of Chapter 16. However, the mining engineer is not done yet.
Conclusion
 This ends Part 1. In Part 2 we will discuss the mining engineer’s next tasks; production scheduling; waste dump design; and equipment selection. The mining engineer QP will sign off and take responsibility for all the mine design work done so far. You are probably wondering why you didn’t select mining engineering as a career. Part 2 is at this link “The Anatomy of 43-101 Chapter 16 – Mining (Part 2)“.
Note: You can sign up for the KJK mailing list to get notified when new blogs are posted. Follow me on Twitter at @KJKLtd for updates and other mining posts. The entire blog post library can be found at https://kuchling.com/library/
For some


 Podcasts. There are thousands of them out there, free for anyone to access. This blog post is about the top mining podcasts that I find entertaining and educational. There are probably some missing from this list that I have not heard about. One only has so much free time in a day.
 Fresh Thinking by Optiro-Snowden
  There is no shortage of material in the podcast world about the mining industry. It all depends on what grabs your attention.
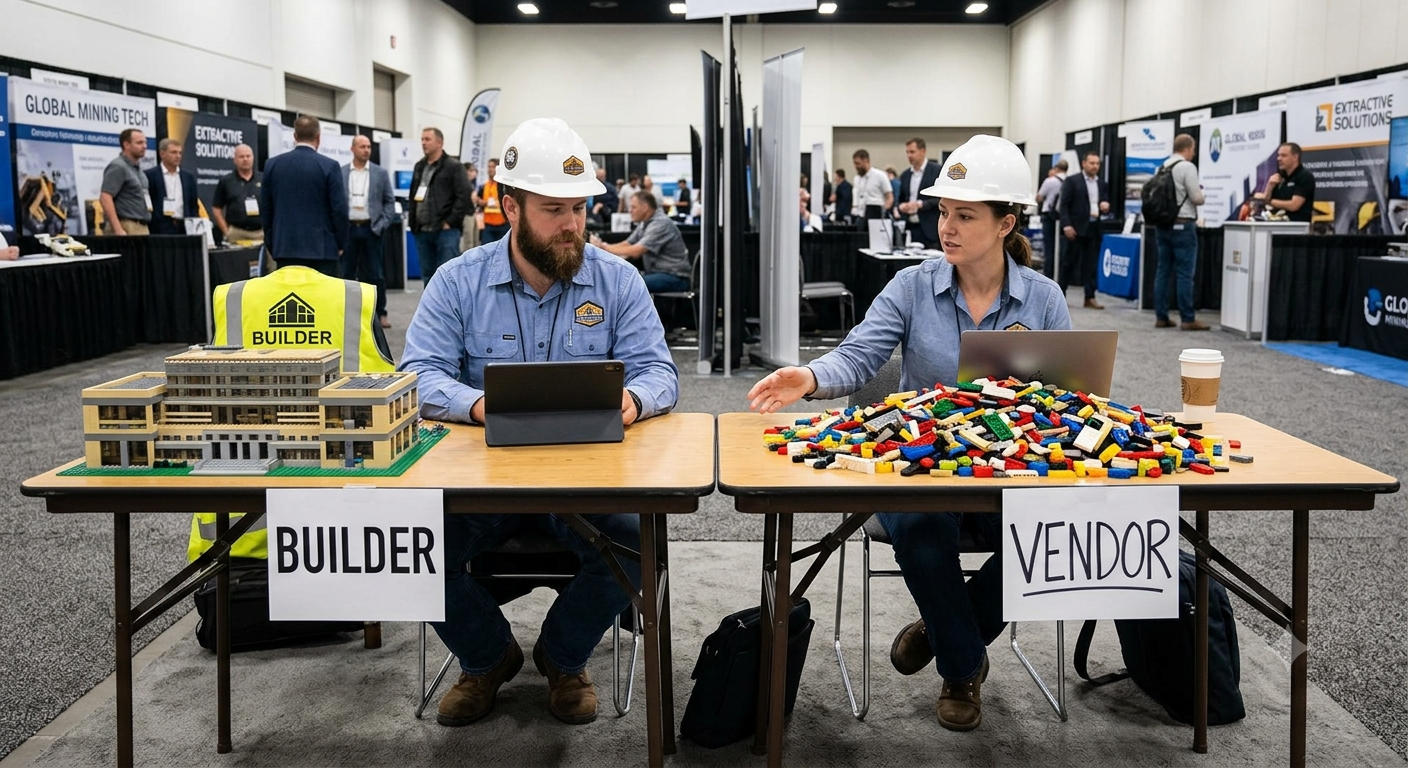 Normally Major and Intermediate miners advance their projects through the study stages with the ultimate intent to actually build the mine. Sometimes they may opt to sell their project if it no longer fits in their long term strategy or if they desperately need some cash. However, selling the project when it was first acquired was likely not their initial intent. They want to be on a Mine Builder path.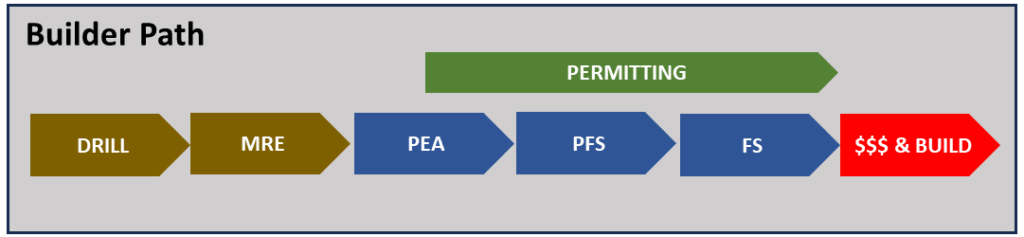
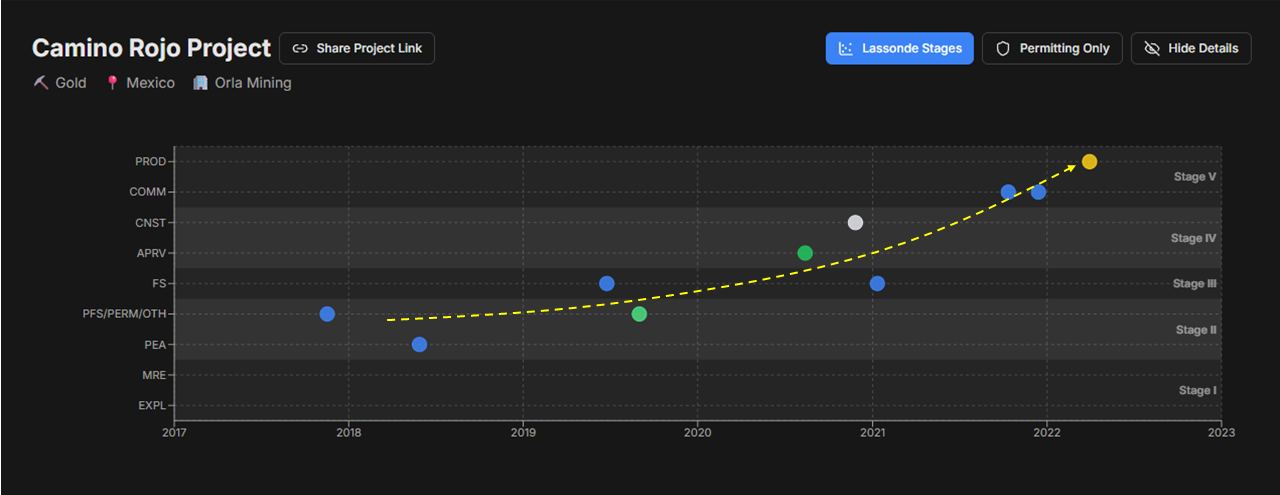
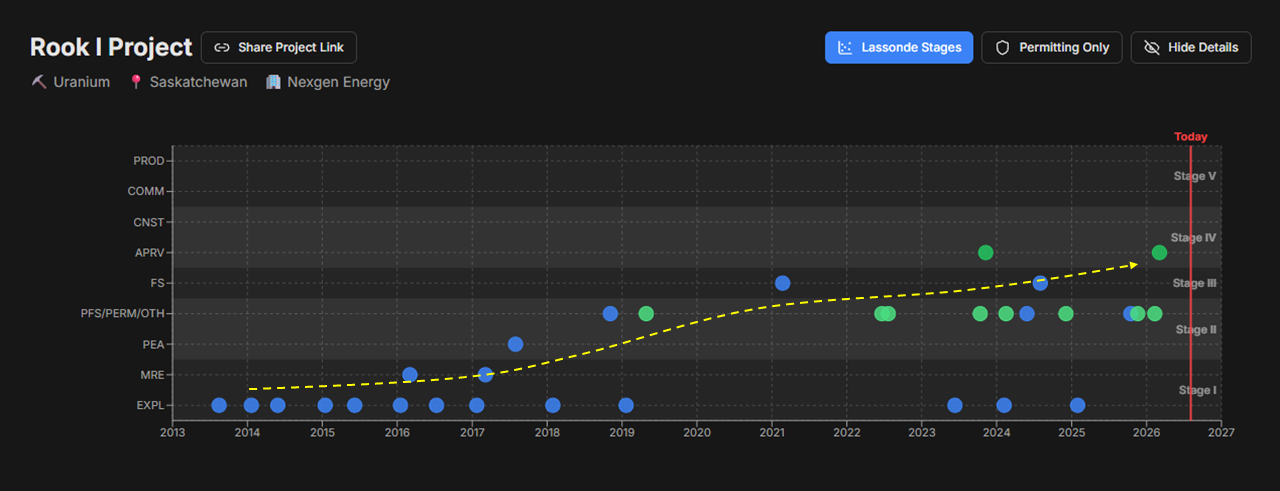
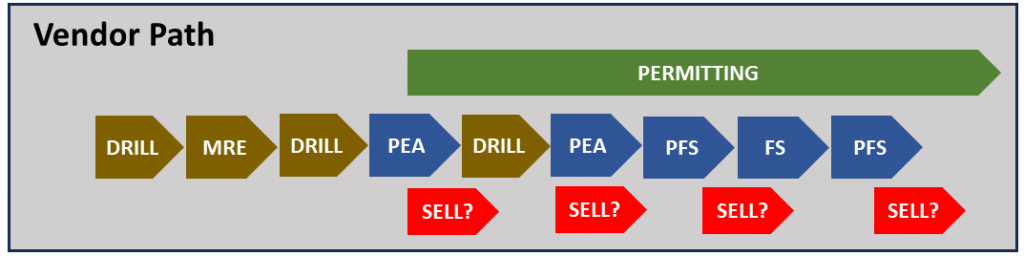
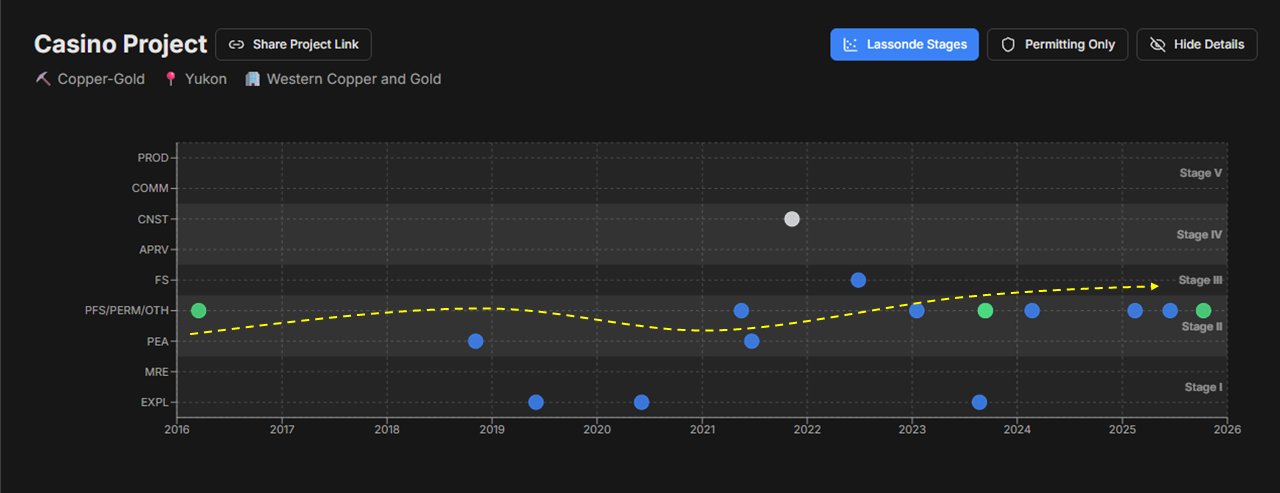
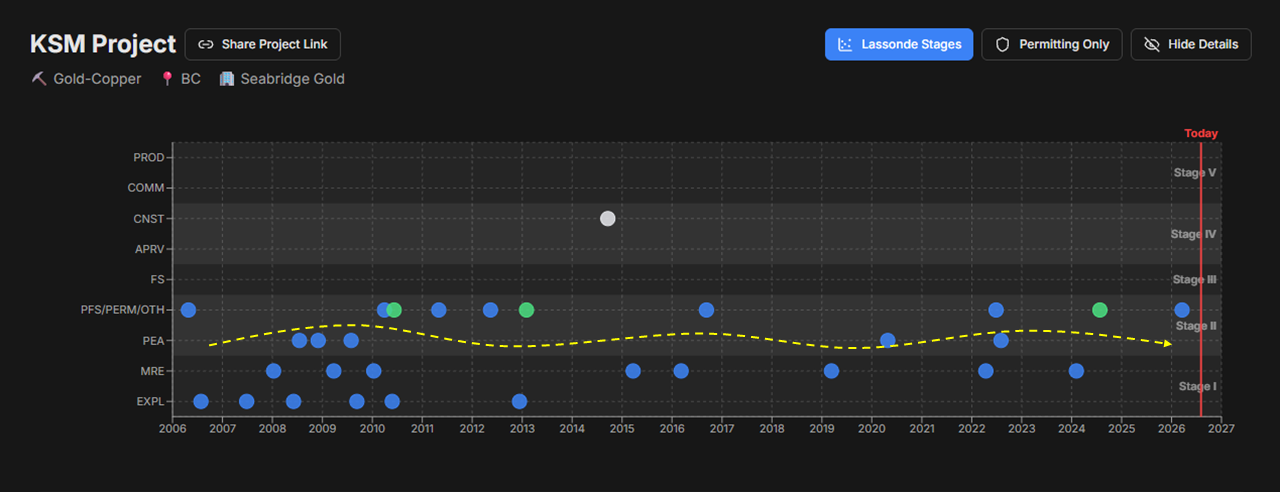
 If an engineer understands that a Mine Builder’s project will move from PEA to PFS to FS in rapid succession, then there is more incentive to ensure each study is somewhat integrated.
 The objective of the Mine Vendor is to make the project attractive to potential buyers. There is less urgency in fast tracking towards detailed engineering.
 As an engineer, it is helpful to understand the objectives of the project owner and then tailor the technical studies to meet those objectives. This does not mean low balling costs to make the study a promotional tool. It means focusing on what is important. It means recognizing the path, and what doesn’t need to be engineered in detail at this time. This may save the client time, money, and improve credibility in the long run.
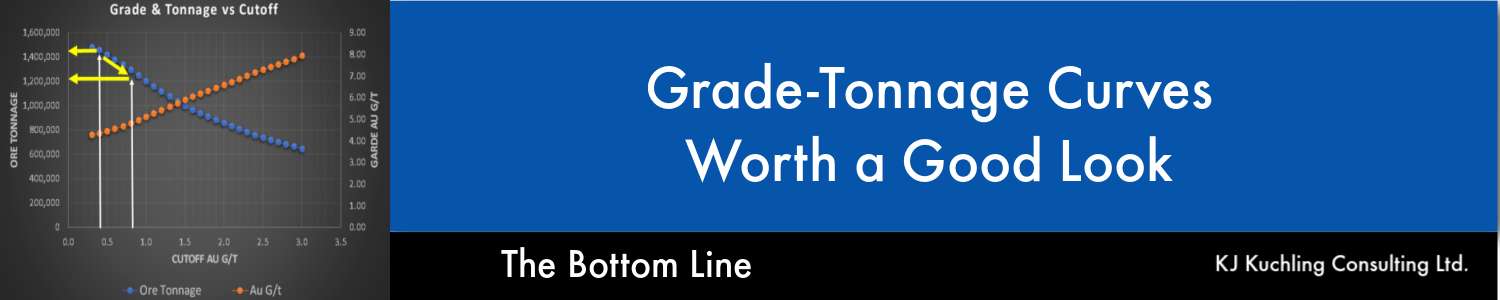
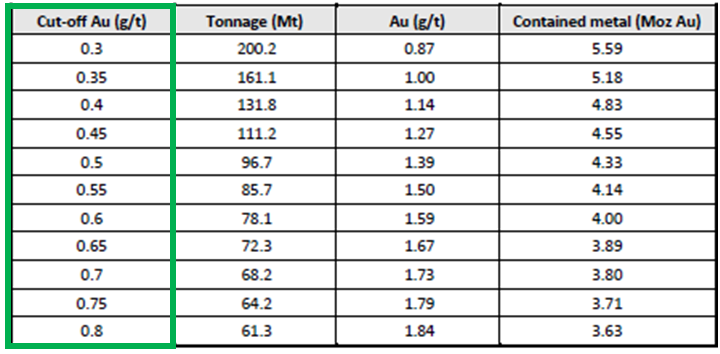
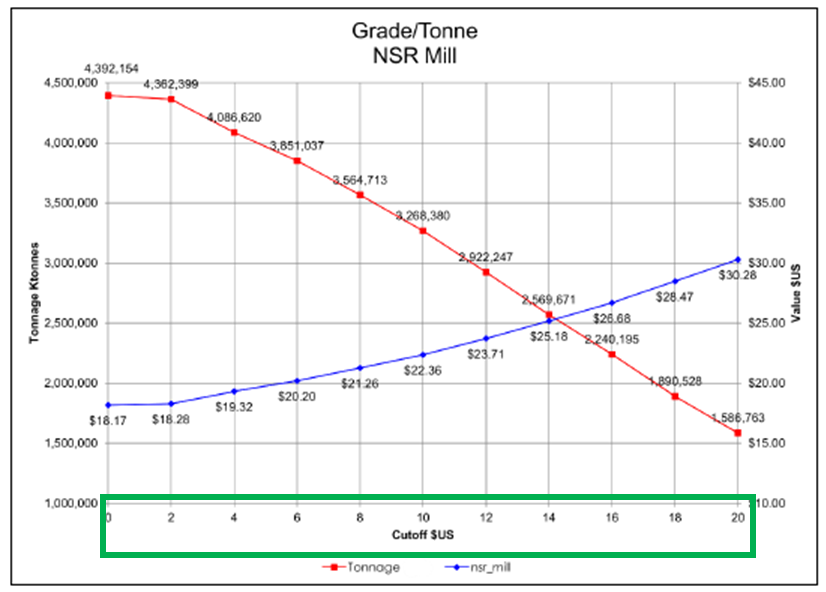
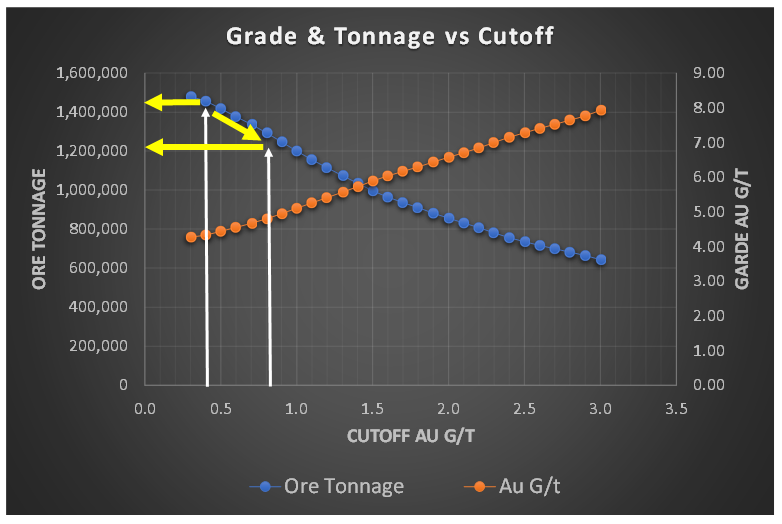 When I am undertaking a due diligence review or working on a study, very early on I like to have a look at the grade-tonnage information. This could be for the entire deposit resource, within a resource constraining shell, or in the pit design.
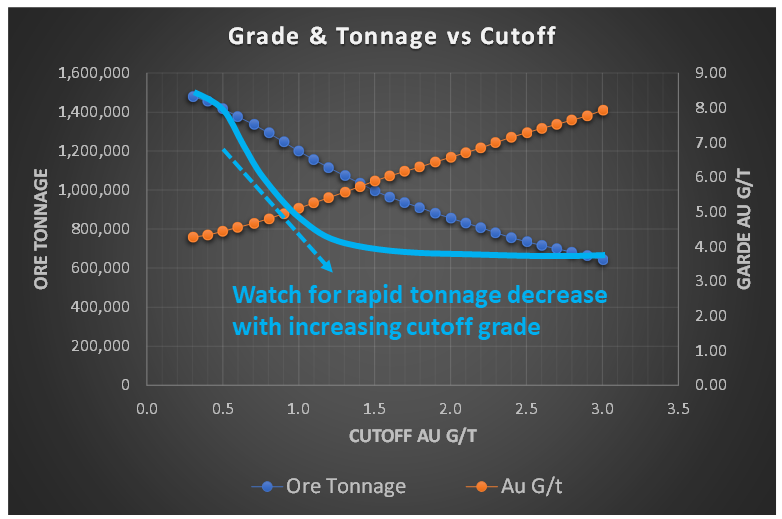 However, if the tonnage curve profile resembled the light blue line in this image, with a concave shape, the ore tonnage is decreasing rapidly with increasing cutoff grade. This is generally not a favorable situation.
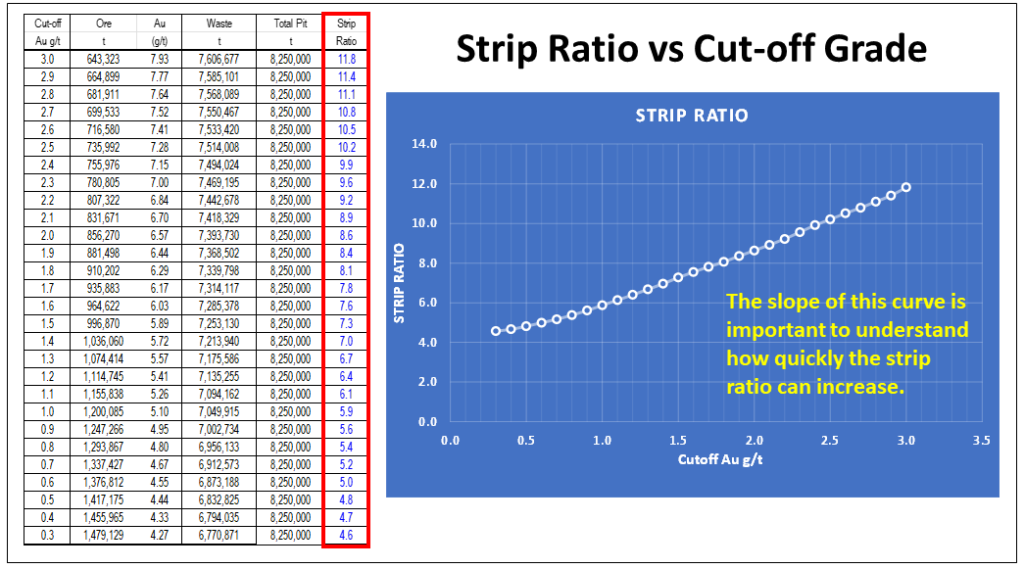 Regarding mineral resources, one should be required to disclose the waste tonnage and strip ratio when reporting resources inside a constraining shell. The constraining shell and cutoff grade are both based on defined economic factors such as unit mining costs, processing cost, process recoveries, and metal prices. With respect to the mining cost component, the strip ratio is a key aspect of the total mining cost, yet it normally isn’t disclosed.
 In 43-101 technical reports, the financial Chapter 22 normally presents the project sensitivities expressed in a spider diagram or a table format.
 When disclosing polymetallic drill results, many companies will convert the multiple metal grades into a single equivalent grade. I am not a big proponent of that approach.
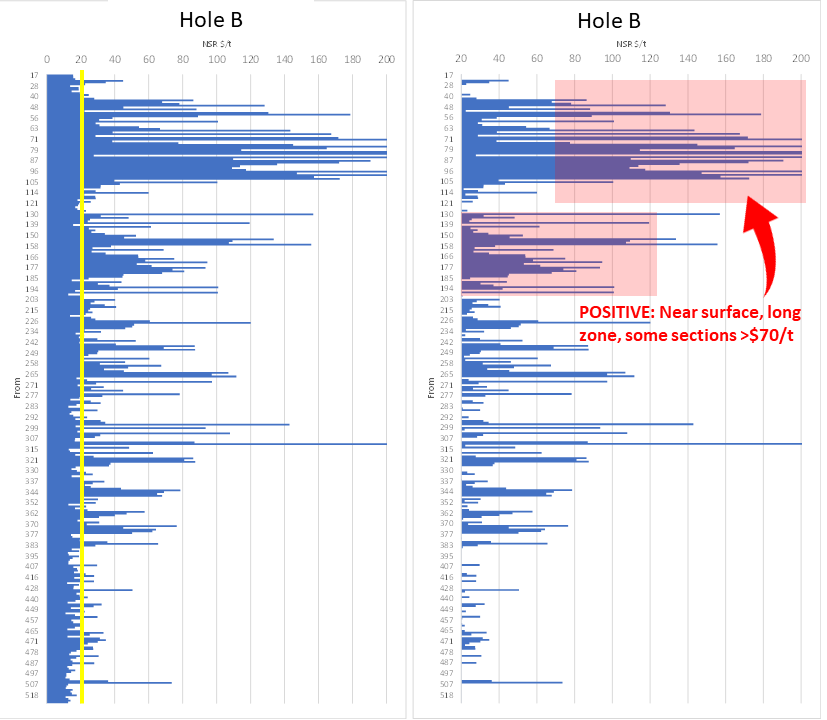
 The three aspects that interest me the most when looking at early-stage drill results are:
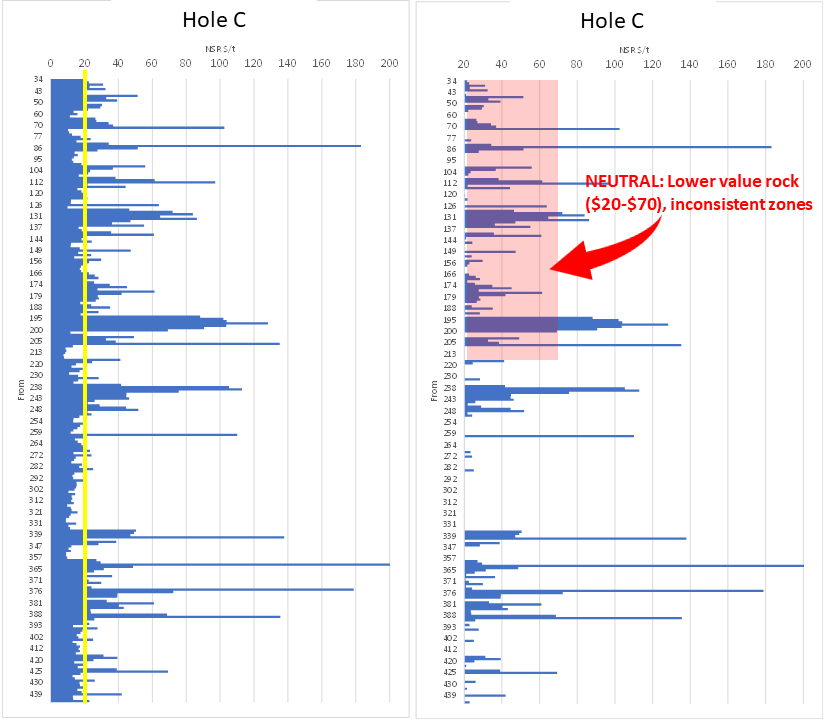
 The “NSR factor” would now be 85% x 85% or 75%. Therefore, if the breakeven cost is $14/t, then one should target to mine rock with an insitu value greater than $20/tonne (i.e. $14 / 0.75). This would be the approximate ore vs waste cutoff. It is still only ballpark estimate at this early stage, but good enough for this type of review.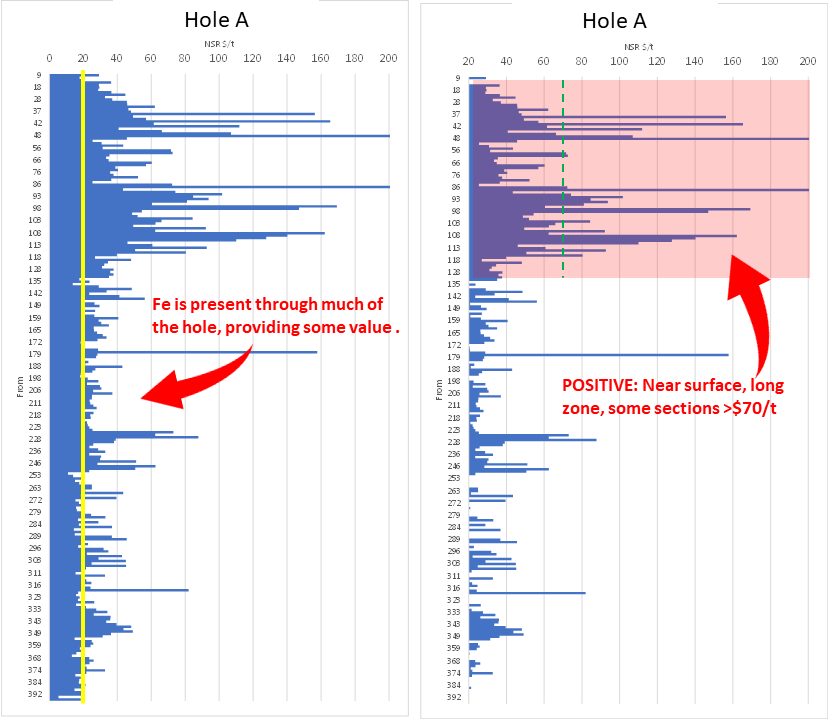


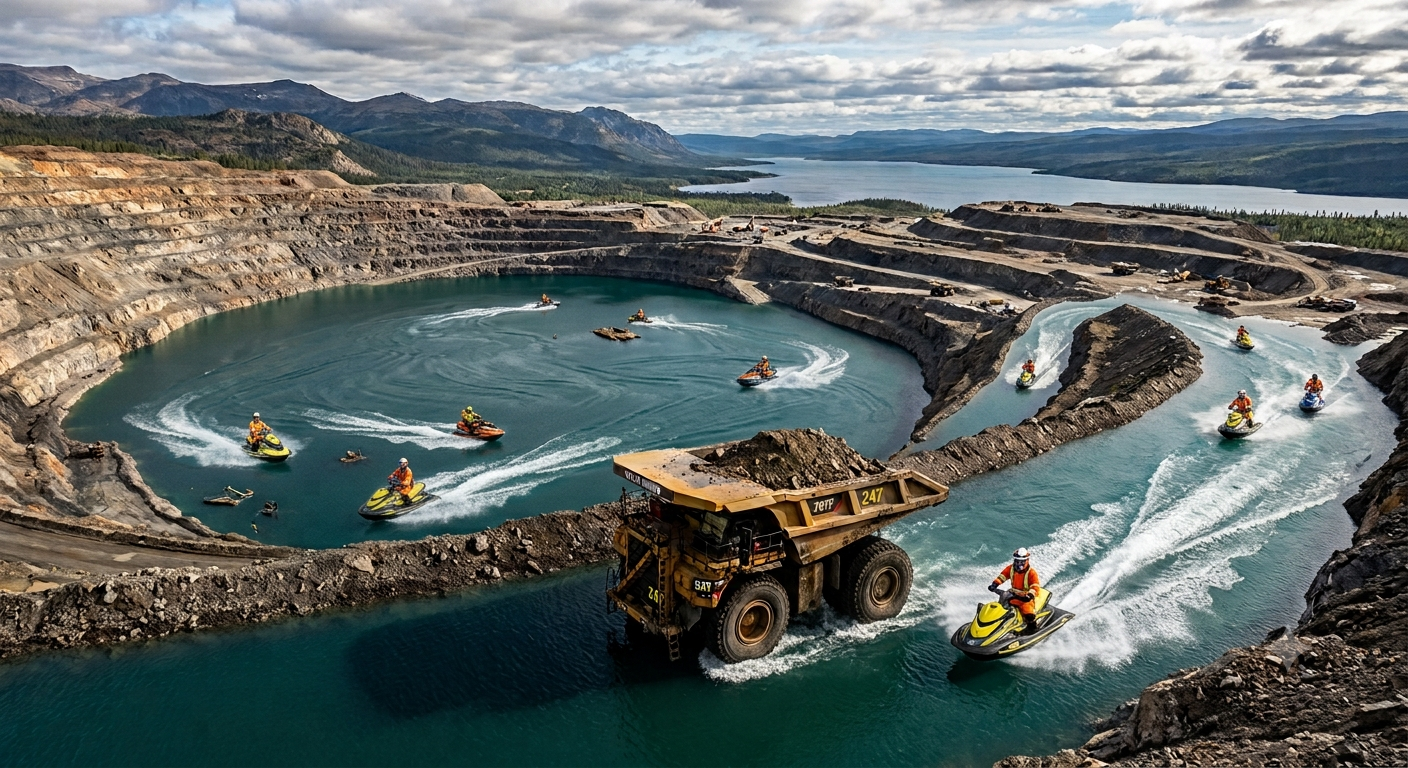 This is Part 2 of a blog post related to open pit mining within bodies of water. Part 1 can be found at this link “
 The primary question to be answered is whether one can mine safely and economically without creating significant impacts on the environment.
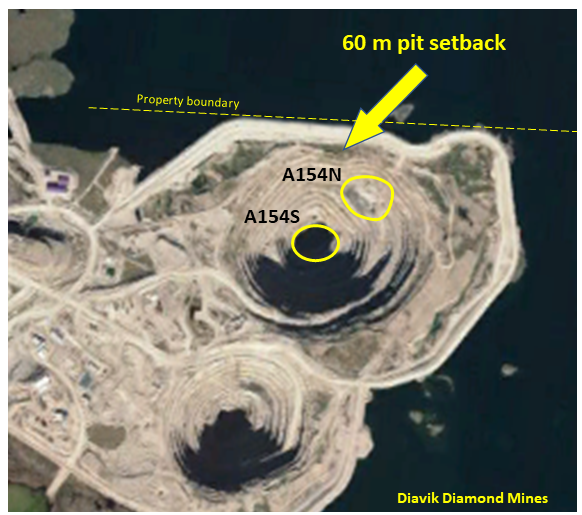
 Once the approximate location of the dike has been identified, the next step is to examine the design of the dike itself. Most of the issues to be considered relate to the geotechnical site conditions.
 Each mine site is different, and that is what makes mining into water bodies a unique challenge. However many mine operators have done this successfully using various approaches to tackle the challenge.
 NPV One is targeting to replace the typical Excel based cashflow model with an online cloud model. It reminds me of personal income tax software, where one simply inputs the income and expense information, and then the software takes over doing all the calculations and outputting the result.
 Pros
Pros Like anything, nothing is perfect and NPV may have a few issues for me.
 The NPV One software is an option for those wishing to standardize or simplify their financial modelling.

 I remember in the late fall of that year, the company had a chance to bid on a larger project in Gros Morne National Park, Newfoundland. So our President, Frank Nolan (he was a brother to Fred Nolan, the infamous land-owner at Oak Island, by the way), decided he wanted to see the site and he chartered a Bell 106 helicopter to fly us there from Deer Lake. It was December (they say “December month” in that province) and when we got close to the Park, we ran into a sudden snow squall.
 The QMM field office In Port Dauphin, Madagascar was located near the edge of town, and I typically walked from my lodging to the office each morning when I was there, about the time when school started for the children. Typically I passed dozens and dozens of tiny bamboo huts with corrugated metal roofs, and dirt floors each about 2 meters square.
 It is one thing to briefly visit a remote project as part of a review team. It is another thing to be there as part of a design team trying to solve a problem and engineer a solution. I know of many engineers and geologists that would have similar work life experiences as part of their careers. However John has taken the initiative to write it all down.
 This game is part of a coal-mining game trilogy created by Thomas Spitzer in Germany. The players take the role of farmers with opportunities to exploit the presence of coal in the Ruhr region of Germany. During the game, players acquire knowledge about coal, extend their farms, and dig deeper in the ground to extract more coal.
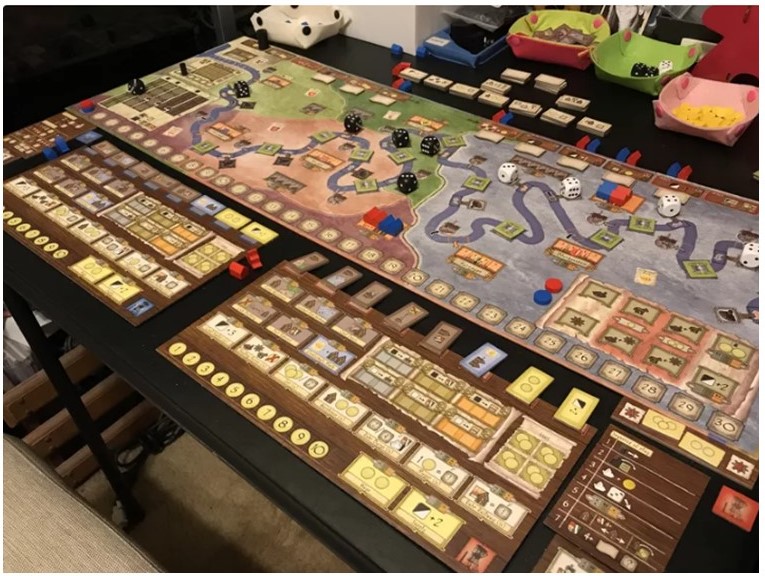 In the second game of Spitzer’s trilogy, you are still in the Ruhr region in the 18th century, at the beginning of the industrial revolution. The Ruhr river presented a transportation route from the coal mines. However, the Ruhr was filled with obstacles and large dams, making it incredibly difficult to navigate.
 This game may still be in German text only. Players are the administrator of a coal mine, and experience competition while living through a piece of Ruhr Valley history.
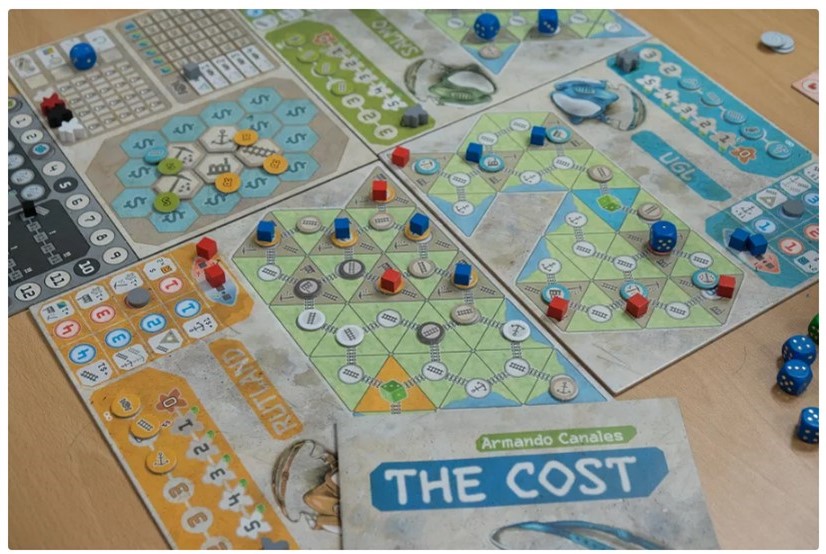 This game takes on a more negative view of the mining industry. It is described as “A bold take on the economics in the brutal industry that is asbestos.” The game players assume the role of a global asbestos company.
 In 1983 my brother, at the age of 10, got his Commodore 64 computer and was eagerly learning to program in BASIC. He was always looking for ideas on what he could write programs about. I had graduated from McGill in Mining Engineering a few years earlier, so I suggested he write a simple computer game about mining as his project.
 Over the last few months I decided to learn VBA (Visual Basic for Applications). VBA is a programming language the works with Microsoft Office products, mainly Excel.

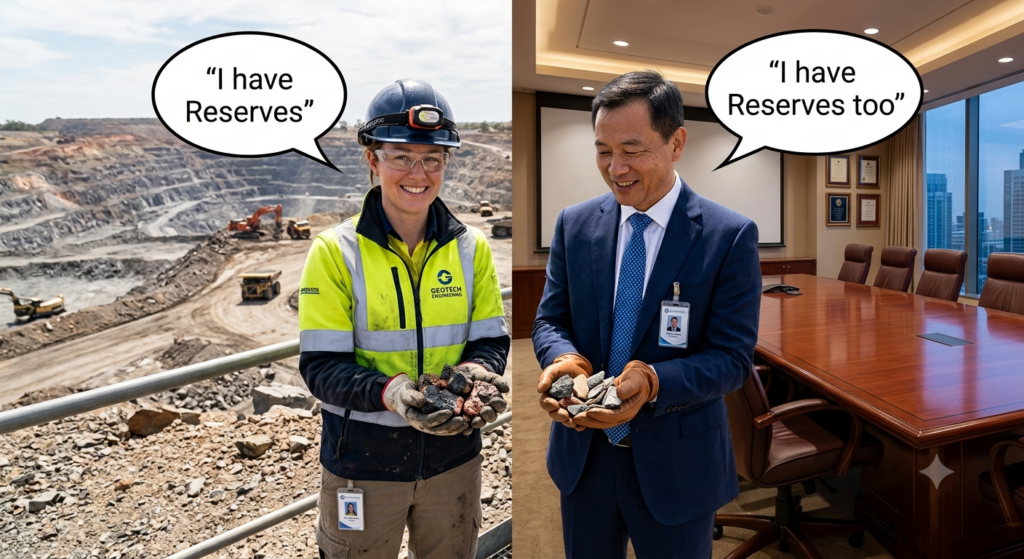 (Posted 2022 Updated 2026) The mining industry reports their exploration results as either Mineral Resources or Mineral Reserves. Mineral Reserves are defined by having a mine in operation or by completing a pre-feasibility or feasibility study. Do the Resources and Reserves adequately reflect the reality of the mining industry? I would suggest perhaps using a three category approach would be more appropriate, for reasons described below.
 I would suggest that instead of the two reporting categories, we think about using three, as described as follows: